

Shooting a Spring-Piston Air Rifle for Dummies
“You don’t suck, you’re just holding it wrong.”
If you feel like you can’t hit the broad-side-of-a-barn with your break-barrel airgun, unfortunately, you’re not alone.
Fortunately, you’ve found this blog post. By the end you’ll learn how to get the most accuracy out of your spring-piston air rifle. If you’re struggling to get good groups from your break barrel (or underlever/sidelever) air rifle, the good news is that there probably isn’t anything wrong with the gun or your shooting abilities – you don’t suck, you’re just holding it wrong.
Why are Spring-Powered Air Rifles so Finicky?
You might have scoffed at that last line. With most firearms and airguns the details of your hold won’t make or break your experience. Respectable and usable accuracy can be obtained simply by steadying the rifle and using sound marksmanship practices (natural point of aim, proper breathing, straight trigger pull, good follow through).
Spring-powered (or “springers”) are different. When a break-barrel, underlever, or sidelever airgun is cocked a large spring is compressed. Pulling the trigger unleashes this spring, sending the piston rushing forward. Air is pushed from the compression tube down the barrel launching the projectile downrange.
Compare this to other airguns (pre-charged pneumatic, CO 2 , multi-pump, etc.) where the air is already compressed, stored, and ready. Pulling the trigger just releases the air. The pressure doesn’t need to be “generated” by a spring or other implement. Firearms are similar since the powder burns very quickly.
With springers, there is significant movement before the pellet has left the barrel. As the piston rushes forward and slams home, the gun recoils forward. The force of the air pushing the pellet down the barrel then generates typical rearward recoil.
There is some double-recoil action here.
Thus, holding the rifle in different ways will change the direction the muzzle is point when the pellet exits. This is why many shooters struggle to shoot their springer – they treat it like a firearm.
The “Correct” Hold
The key to shooting a springer accurately is to hold it in such a way that the recoil impulse is the most consistent. Generally, this is best accomplished by using a loose hold (light shoulder pressure, loose grip, and gentle cheek weld) so that the rifle can recoil freely. This has been called the “artillery hold” since large artillery guns (like a Howitzer) are allowed to recoil freely. In short, you’ll need to let the gun recoil. This sounds counter-intuitive, but trust me on this one.
Not only does the firmness of your hold matter, but the positioning of your support hand or rest. Changing anyone of those factors will actually change your group size and your point of impact. To achieve acceptable accuracy, you need to find the right hold and duplicate it for each shot.
A Demonstration
To illustrate this, I shot four separate five-shot groups at 30 yards using four different holds. The rifle used for this test is my left-handed Air Arms TX200. It is wearing a Hawke Airmax 30 Compact 6-24×50. It’s beautiful, isn’t it?
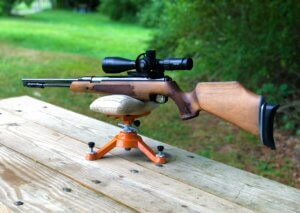
Side note – springer’s double recoil can wreak havoc on scopes. They’ll lose zero or get trashed entirely. There are specific “airgun-rated” scopes designed to withstand this. My personal favorite is the Hawke Airmax. I’ve never had an issue with one on a springer and Hawke has a great lifetime warranty just in case. They are clear, affordable, excellent
optics all around.
Although this is a Cadillac setup, these principles can be applied to any springer. It should be noted that before you experiment with your hold, you should also make sure that all of your stock screws are tight and you’re shooting quality pellets. The right hold doesn’t mean jack if the action is rattling around in the stock.
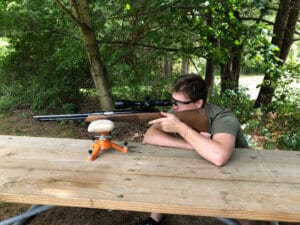
Hold #1: The Death-Grip
Our first hold is the “death-grip” common among many recreational firearm shooters. Very firm shoulder pressure and cheek weld, tight grip on the stock with the fore-end nestled firmly into the front rest.
Here are the accuracy results (spoiler alert…pretty whack):

Notice how there are two groups of two shots that are far apart from each other. It seems the rifle wants to group. The inconsistency is caused by the firm hold. No matter how tightly I grip the gun, I can’t force that spring to recoil the same way every time. This variation in recoil (caused by my hold) is screwing up my groups.
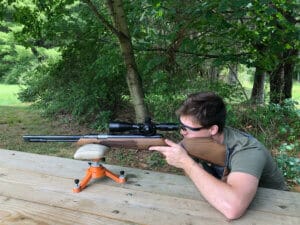
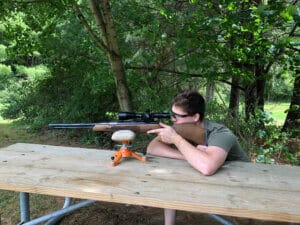
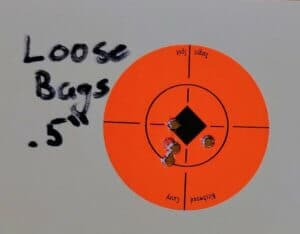
Hold #2: Double Bags
Again, a conventional shooting hold using a front and rear bag, still with firm should pressure and a tight grip.
The double-bags performed even worse than the death grip. If you use any sort of lead-sled or vice you’ll really see some scary things…
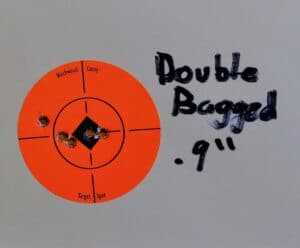
Here we see the same trend. It starts to group, but then jumps around.
Hold #3: Getting Closer
Here, I am still using the front bag but no rear rest. Moderate shoulder pressure and cheek weld. Very loose grip with the firing hand. The bag is sitting close to the rifle’s balance point.
According to our theory, our group should be tighter. It is. Told ya.
There’s only two outside of the main group now and the overall group size is about 40% smaller.
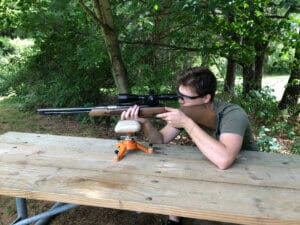
Hold #4: The Artillery Hold
Last but certainly not least is the “artillery hold”. Here, I am resting my hand on the bag and resting the gun on my open palm. I am not gripping the forearm. It’s just resting there. I have a very light cheek weld and firing grip with light shoulder pressure – barely pulling the rifle into me. To ensure consistent hand placement, I index the knuckle of support hand in the cocking slot. It’s as snug as a bug in a rug in there.
As expected, this was our best group by a long shot.
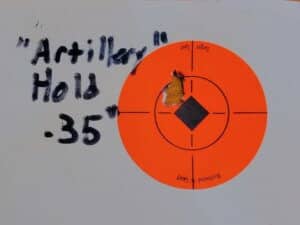
BOOM. There it is. This rifle’s true potential has been revealed. Letting the rifle recoil facilitates a consistent recoil impulse from shot to shot. Consistency is the key to accuracy which is why this hold works.
All the groups together:
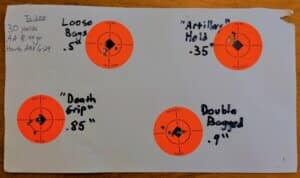
The group with the artillery hold was smaller and had a different point of impact as well.
Key Takeaways
– Lesson #1: The Air Arms TX200 kicks ass.
– Lesson #2: Springers like to be held a certain way.
– Lesson #3: The artillery hold generally works and is a great starting point. From
there, experiment with shoulder pressure, cheek welds, and hand placement.
All of this may sound like a hassle – it kind of is – but don’t despair. Once you find that goldie-locks hold, you’re set and anything approximating it should yield good results.
For many shooters, gripping the rifle is taken for granted. It’s automatic and never really examined. Taking the time to refine this part of your shooting technique with a spring- piston rifle will absolutely carry over to your other shooting endeavors and improve your overall marksmanship.
Earlier in this post, I talked about other airgun power plants. If you’re interested to see how springers stack up against PCP’s (in other words if finding that perfect hold is worth it), check out this video!